
In this article
Introduction
CRM integration with 3CX enables you to launch calls with a single click directly from your applications, as well as linking incoming calls to customer records within your CRM package. This kind of functionality is a great time saver, and allows you to continue to focus on work, rather than simple administration.
3CX offers great flexibility with their CRM integration, supporting many popular CRM packages on the server side, and allowing for others to be added with plugins on the client side.
While offering the option for either is great, particularly for those using less common CRM packages, connecting your CRM to your PBX on the server side is infinitely easier. A couple of clicks from your management console easier.
This is great news for businesses using Microsoft Dynamics 365 – as no longer do they have to download plugins for integration with their 3CX phone system.
This week, 3CX has added Microsoft Dynamics 365 to their growing list of available and supported CRM integrations. Now your administrator can easily setup your integration from the 3CX Management Console without even having to think about your 3CX clients.
How do integrate Microsoft Dynamics 365 CRM with 3CX
Microsoft Dynamics 365 Online Configuration
1. Login to your Microsoft Dynamics 365 account
2. Azure Active Directory > App Registrations > New Application Registration
3. Complete the following information:
Name: 3CX Server Side
Application Type: Native
Redirect URI: httpsss://MY_3CX_URL/api/oauth2crm
Replace “MY_3CX_URL” with the URL you use to access your 3CX console.
4. The details you have added will be displayed. Make a note of the Application ID as you will need this later in the process.
5. Add permissions to allow access to Microsoft Dynamics 365 information:
Settings > Required Permissions > Add
6. Select an API > Dynamics CRM Online API > Select (below)
7. Check all permissions boxes and click Select, and click Done to complete the required permissions process.
You may now remove the “Windows Azure Active Directory” permissions as they are not required.
8. Obtain the Tenant ID
Azure Active Directory > App Registrations > Endpoints
9. Take note of the Tenant part of any endpoint, as this will be required later in the process when configuring 3CX.
After obtaining the Tenant ID we are ready to configure the 3CX server.
3CX CRM Server Side Configuration
1. Login to the management console and navigate:
Settings > CRM Integration > Server Side tab
2. Select Microsoft Dynamics 365 from the dropdown list
3. Enter the Application ID and Tenant ID from the Microsoft Dynamics 365 Online Configuration
For Domain: enter the URL you use to access your Microsoft Dynamics 365 account.
Select Authorize.
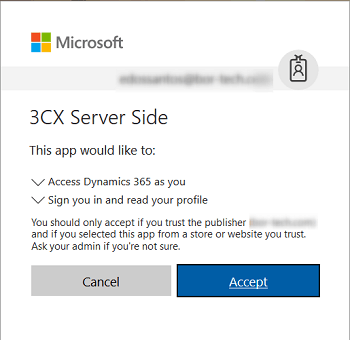
4. A new tab will be opened, and you will be required to click Accept to grant access
5. Setup is ready – click OK to save all changes.
The test button at the top of the configuration page can be used to test your new integration.